Since the start of 2018 I’ve been interested in tiny houses thanks to Bryce from Living Big in a Tiny House. If you haven’t seen his channel he often uploads amazing spaces in breathtaking locations and describes how they reached their goal throughout the episode. His channel can be found here: https://www.youtube.com/channel/UCoNTMWgGuXtGPLv9UeJZwBw.
Housing
This got me thinking about what I wanted to do with my life, did I really want to end up borrowing over $300,000 and have to pay back something close to $500,000 over 30+ years? Not if I could help it! So I got thinking about how I would go about following my dream of living a life without debt, strings or paperwork and ended up at a tiny house on wheels to start me off. The alternatives were to rent forever which would be just as costly as borrowing, fitting out a small van with a bed much like this http://sean.cm/i/van-build/, or building a small house on a foundation.
The van idea was very enticing as you don’t need a hefty truck or ute to pull an entire house with which would cost a fair bit more. Also it’s much stealthier so you’re able to park basically anywhere and get away with it overnight as long as you don’t stay in the same place too long or people may start to ask – who’s that guy parked over the road, and what are they doing? Once the police know your number plate and what you’re doing in the van the game is pretty much over and they will keep an eye out for you.
So this brings me to a tiny house on wheels. I realized it would take quite a substantial amount of research, skills and equipment to get the house built so I set out to firstly understand what is required in a house. I watched every one of Bryce’s early videos on his channel where he develops his own house and gives a lot of vital information on design techniques, framing, sheeting, sheathing etc. There were a lot of other channels I took advice from such as Tiny Real Estate which is an Australian based channel which helped me understand the local laws and building requirements.
The next step I proceeded with was drawing up some plans of where I wanted rooms and storage. My preferred drawing program is Autocad as I have experience from using it back in school when learning Graphics. 3DS Max is also my preferred 3D program which I’ll model the house in to get a feel for how it will look and make adjustments to both the 2D and 3D versions from there to keep them both updated.
Size/Space
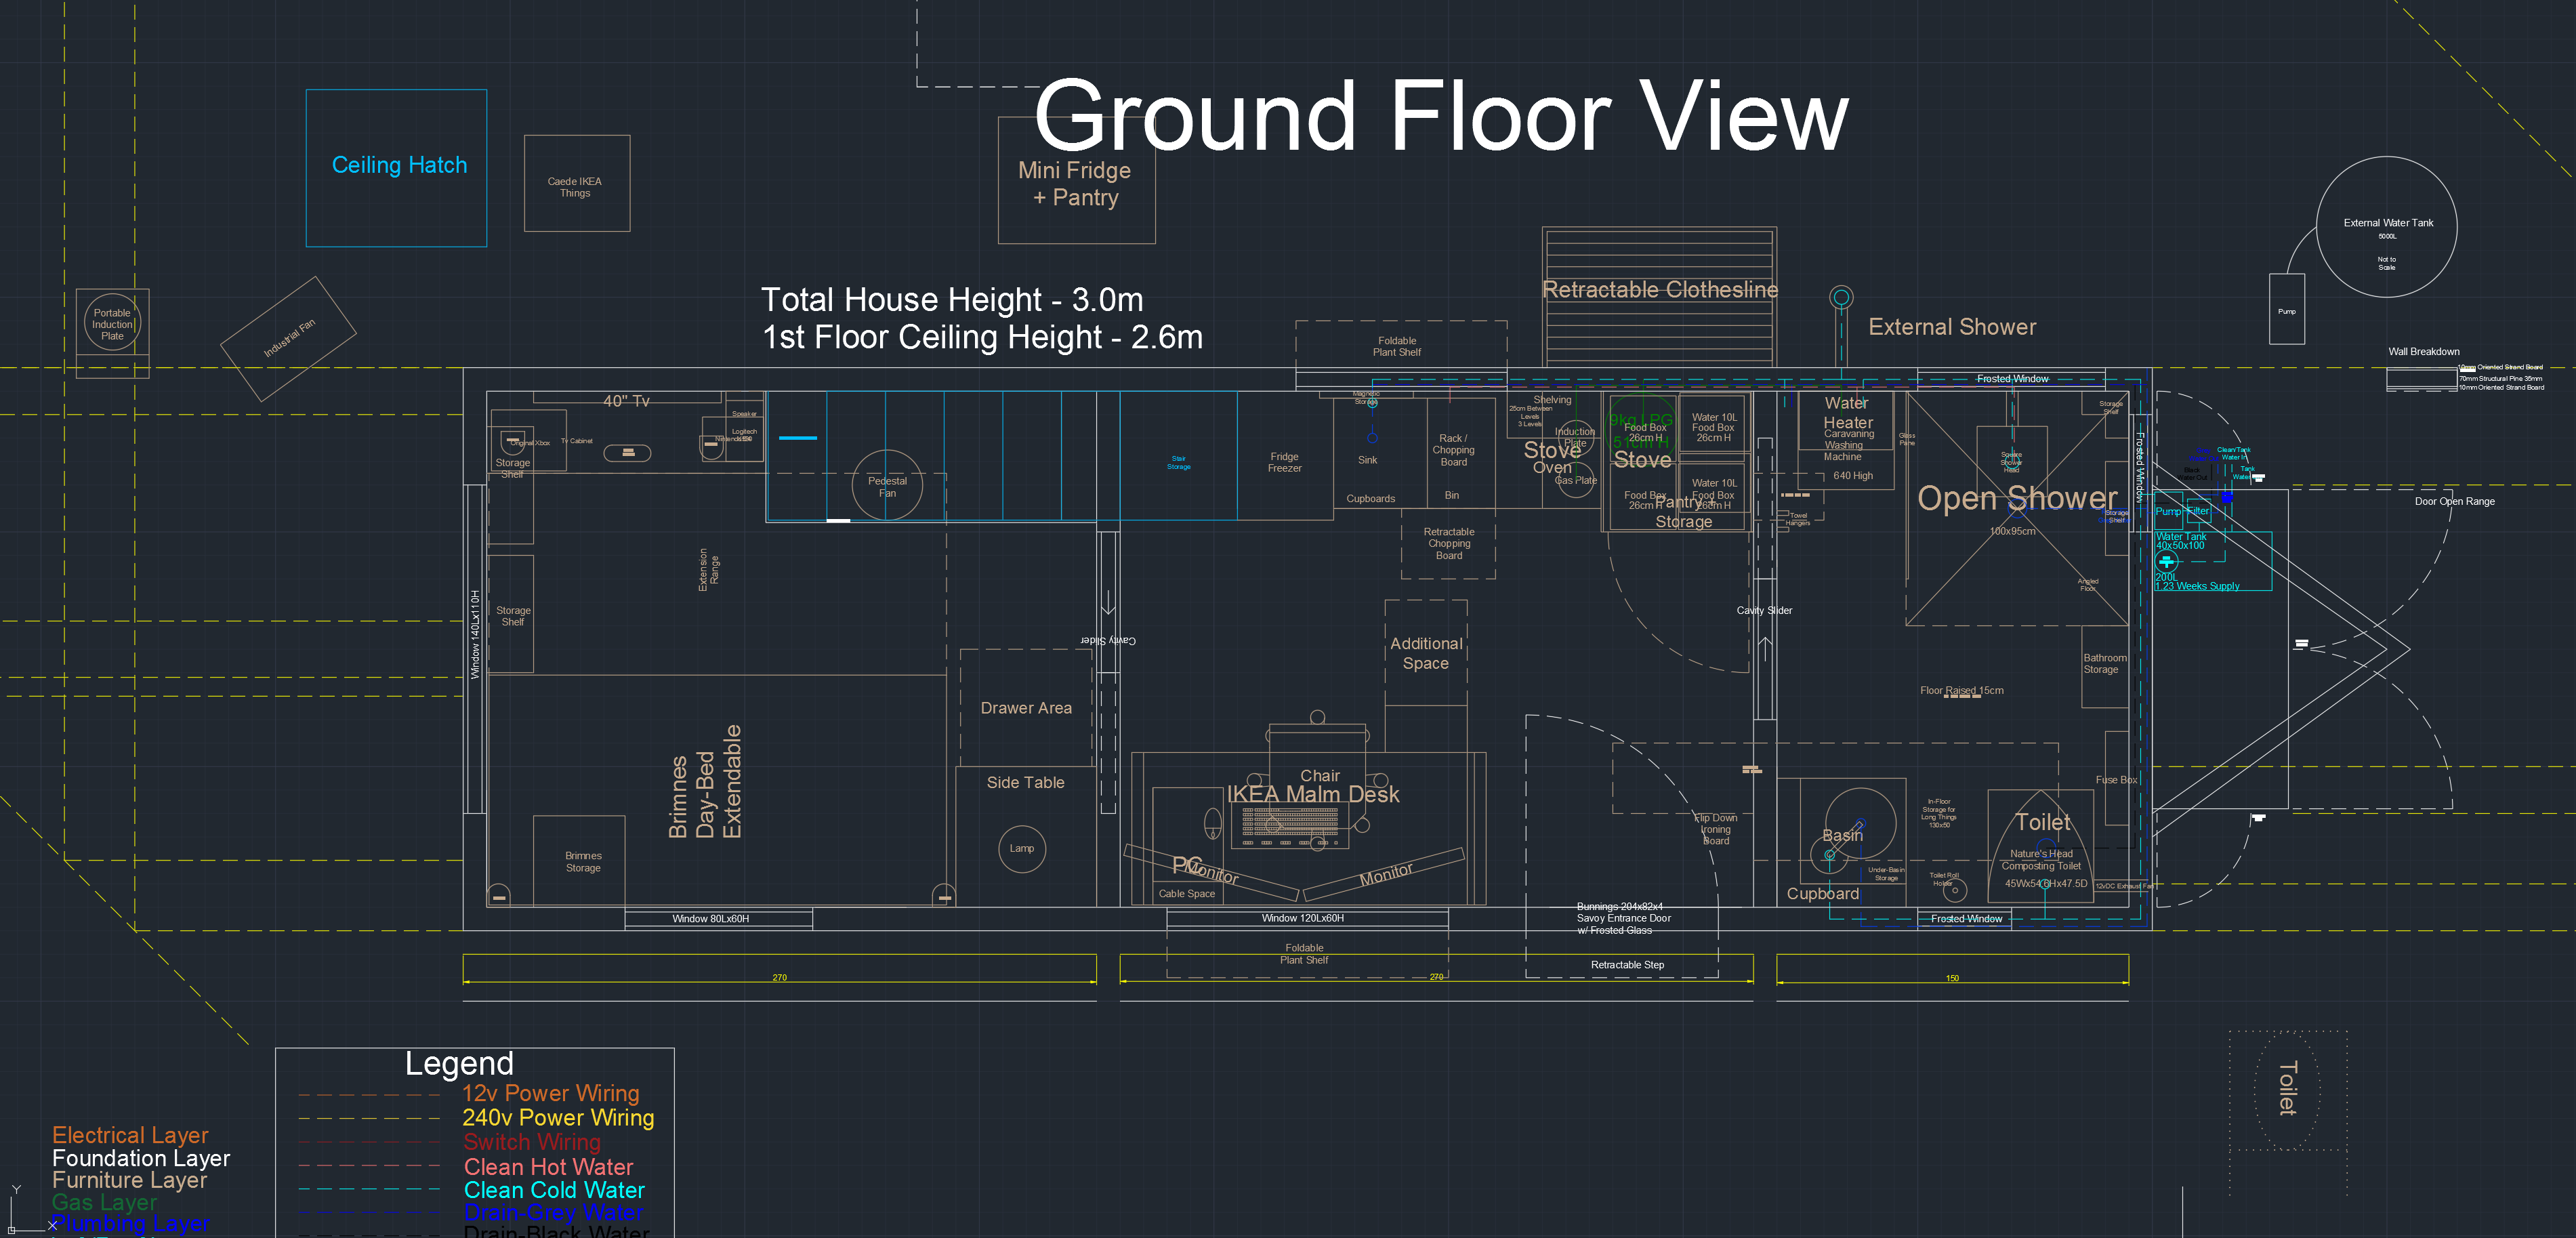
It has been difficult deciding how big I want the house keeping in mind towing requirements and how big a vehicle you need to tow it. At first I had a loft and a 6m house, then I changed it to having no loft to save space and maximum height requirements and then I added 1.2m to make it 7.2m total for a more spacious feel.
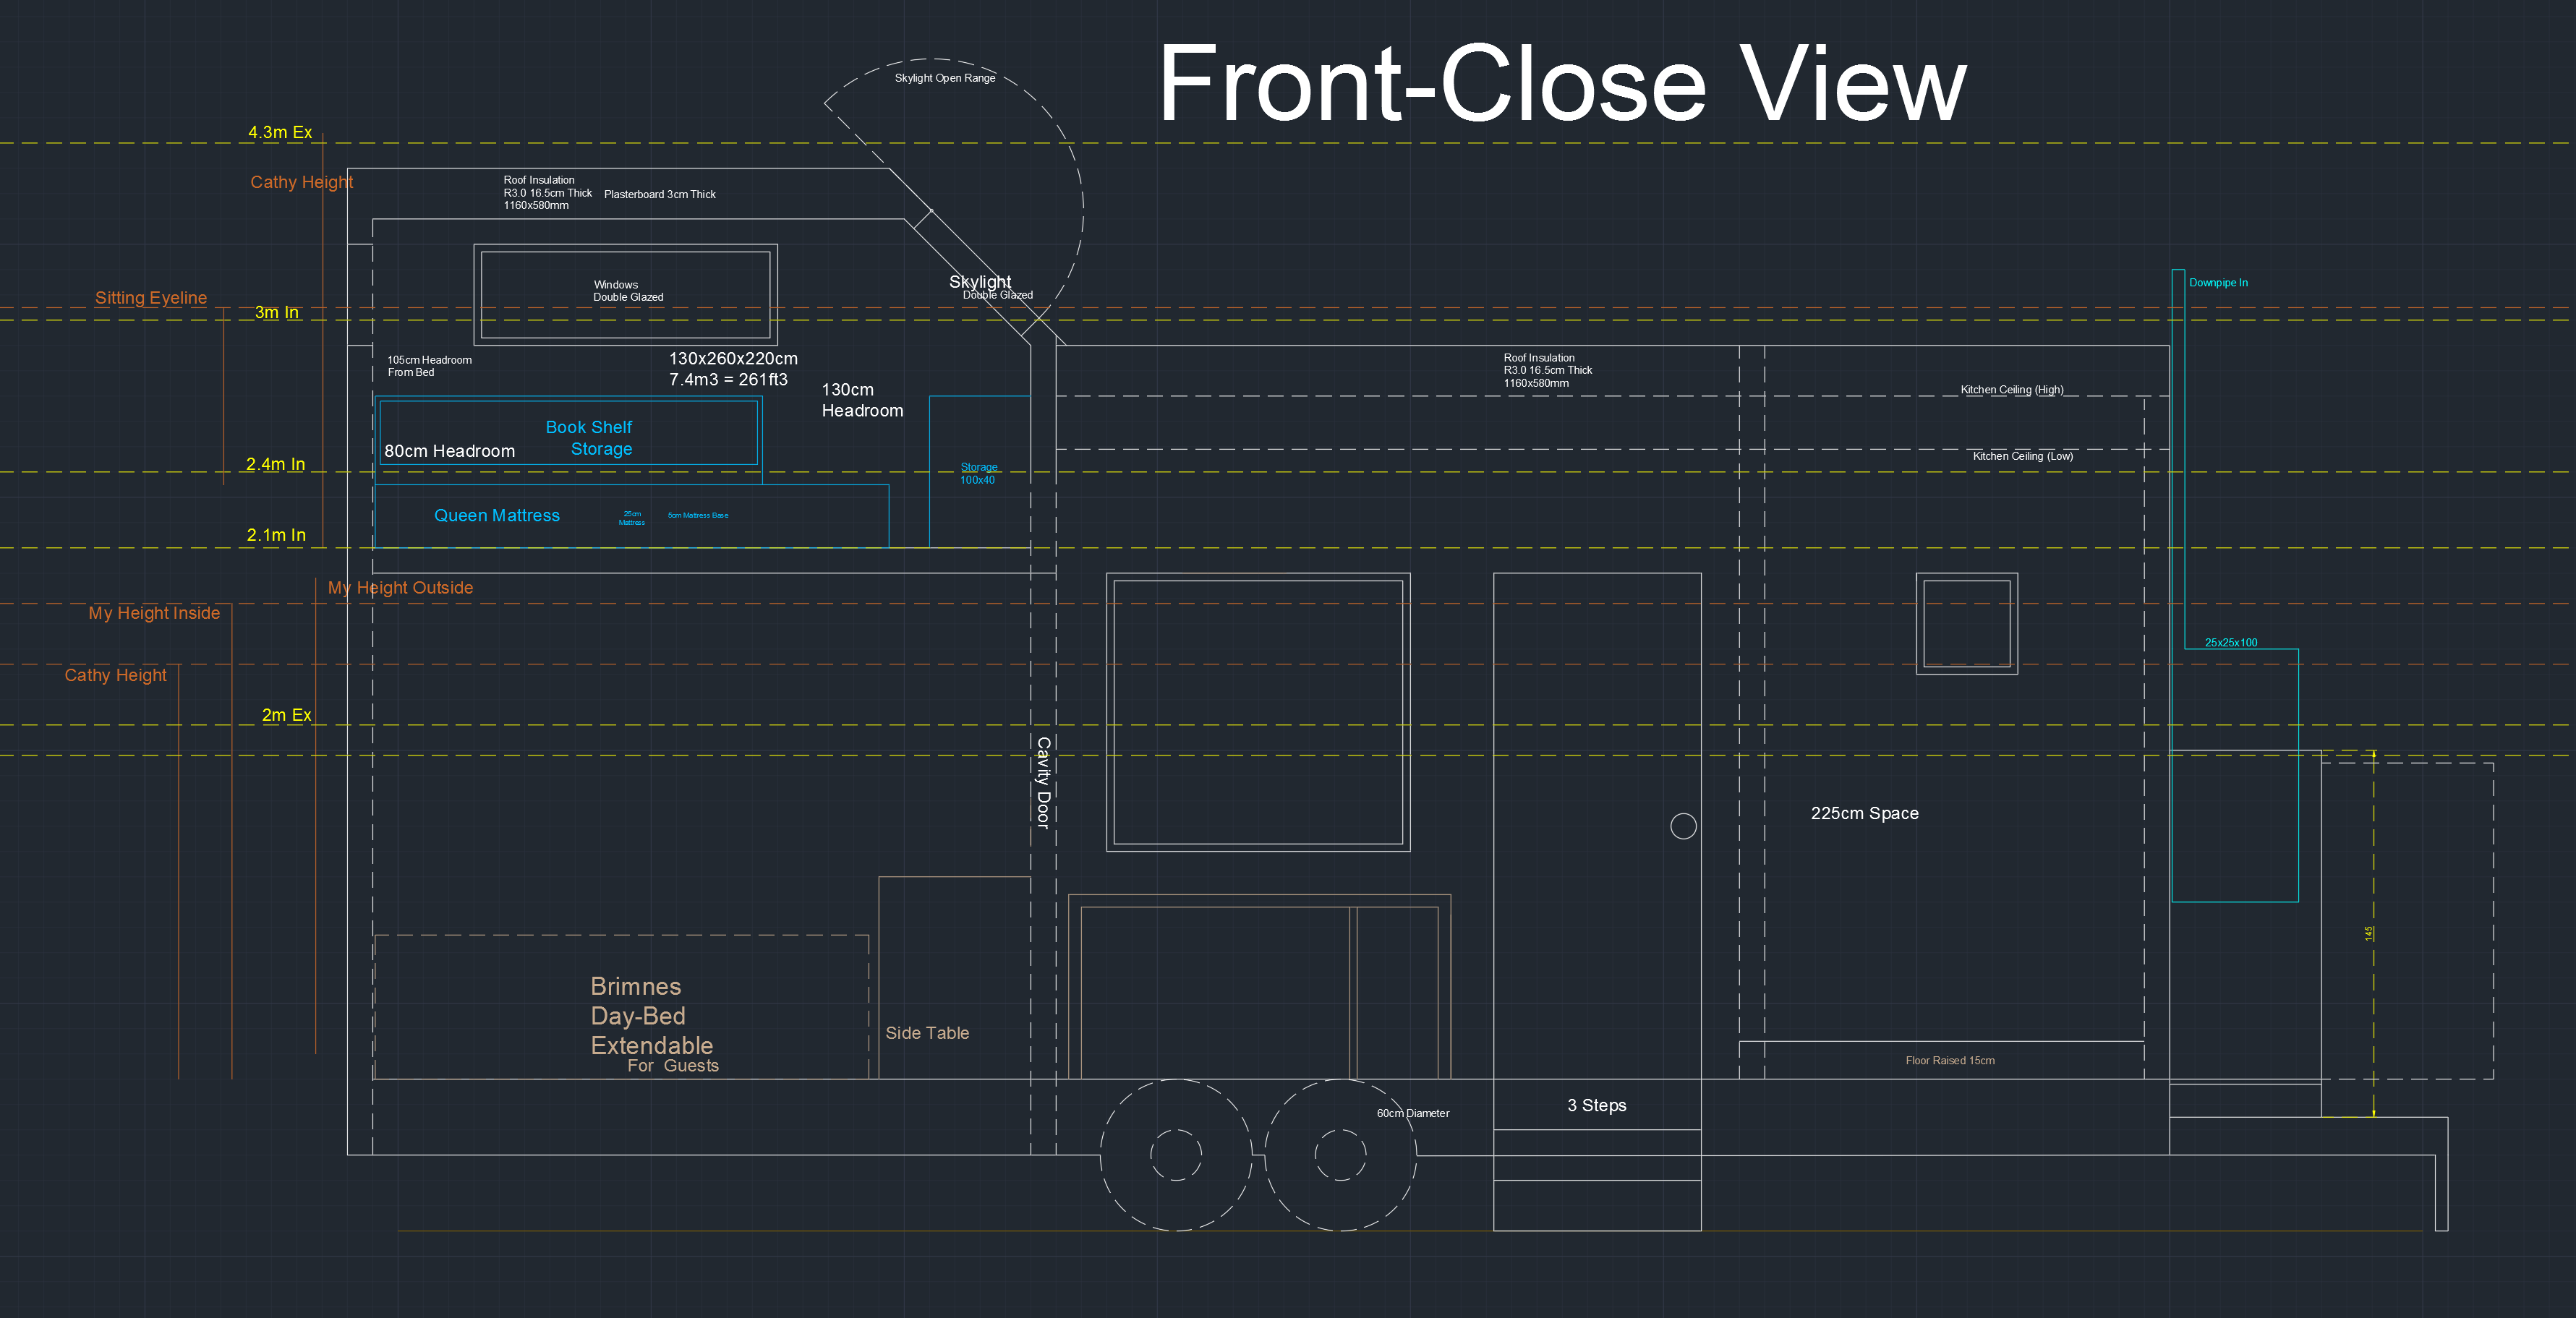
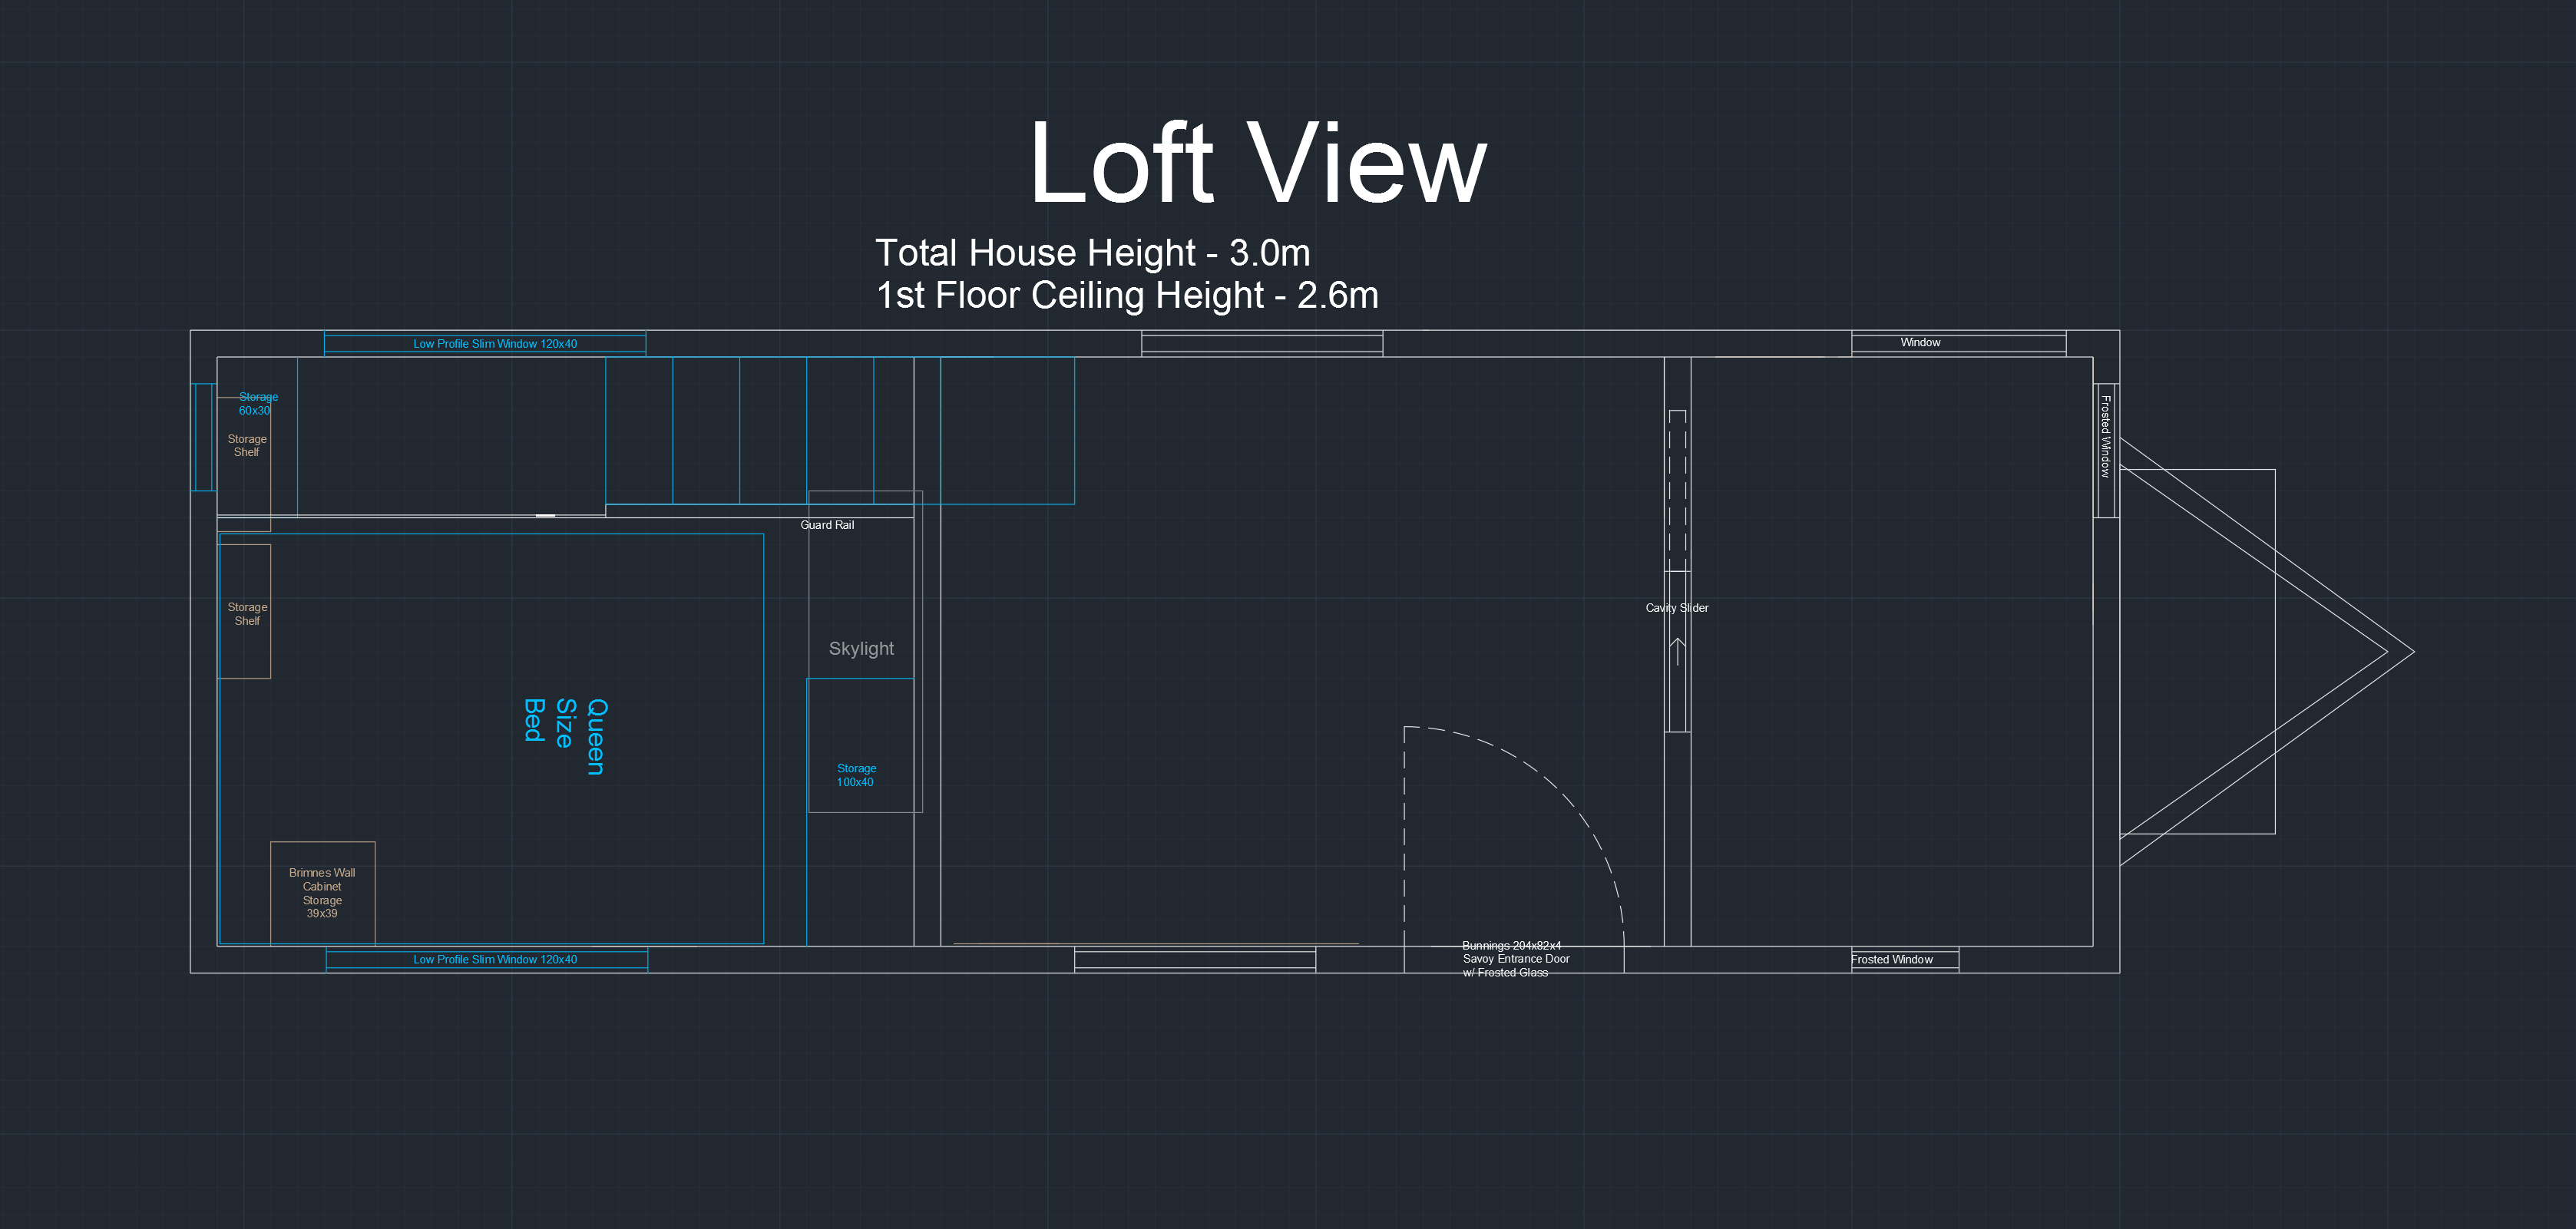
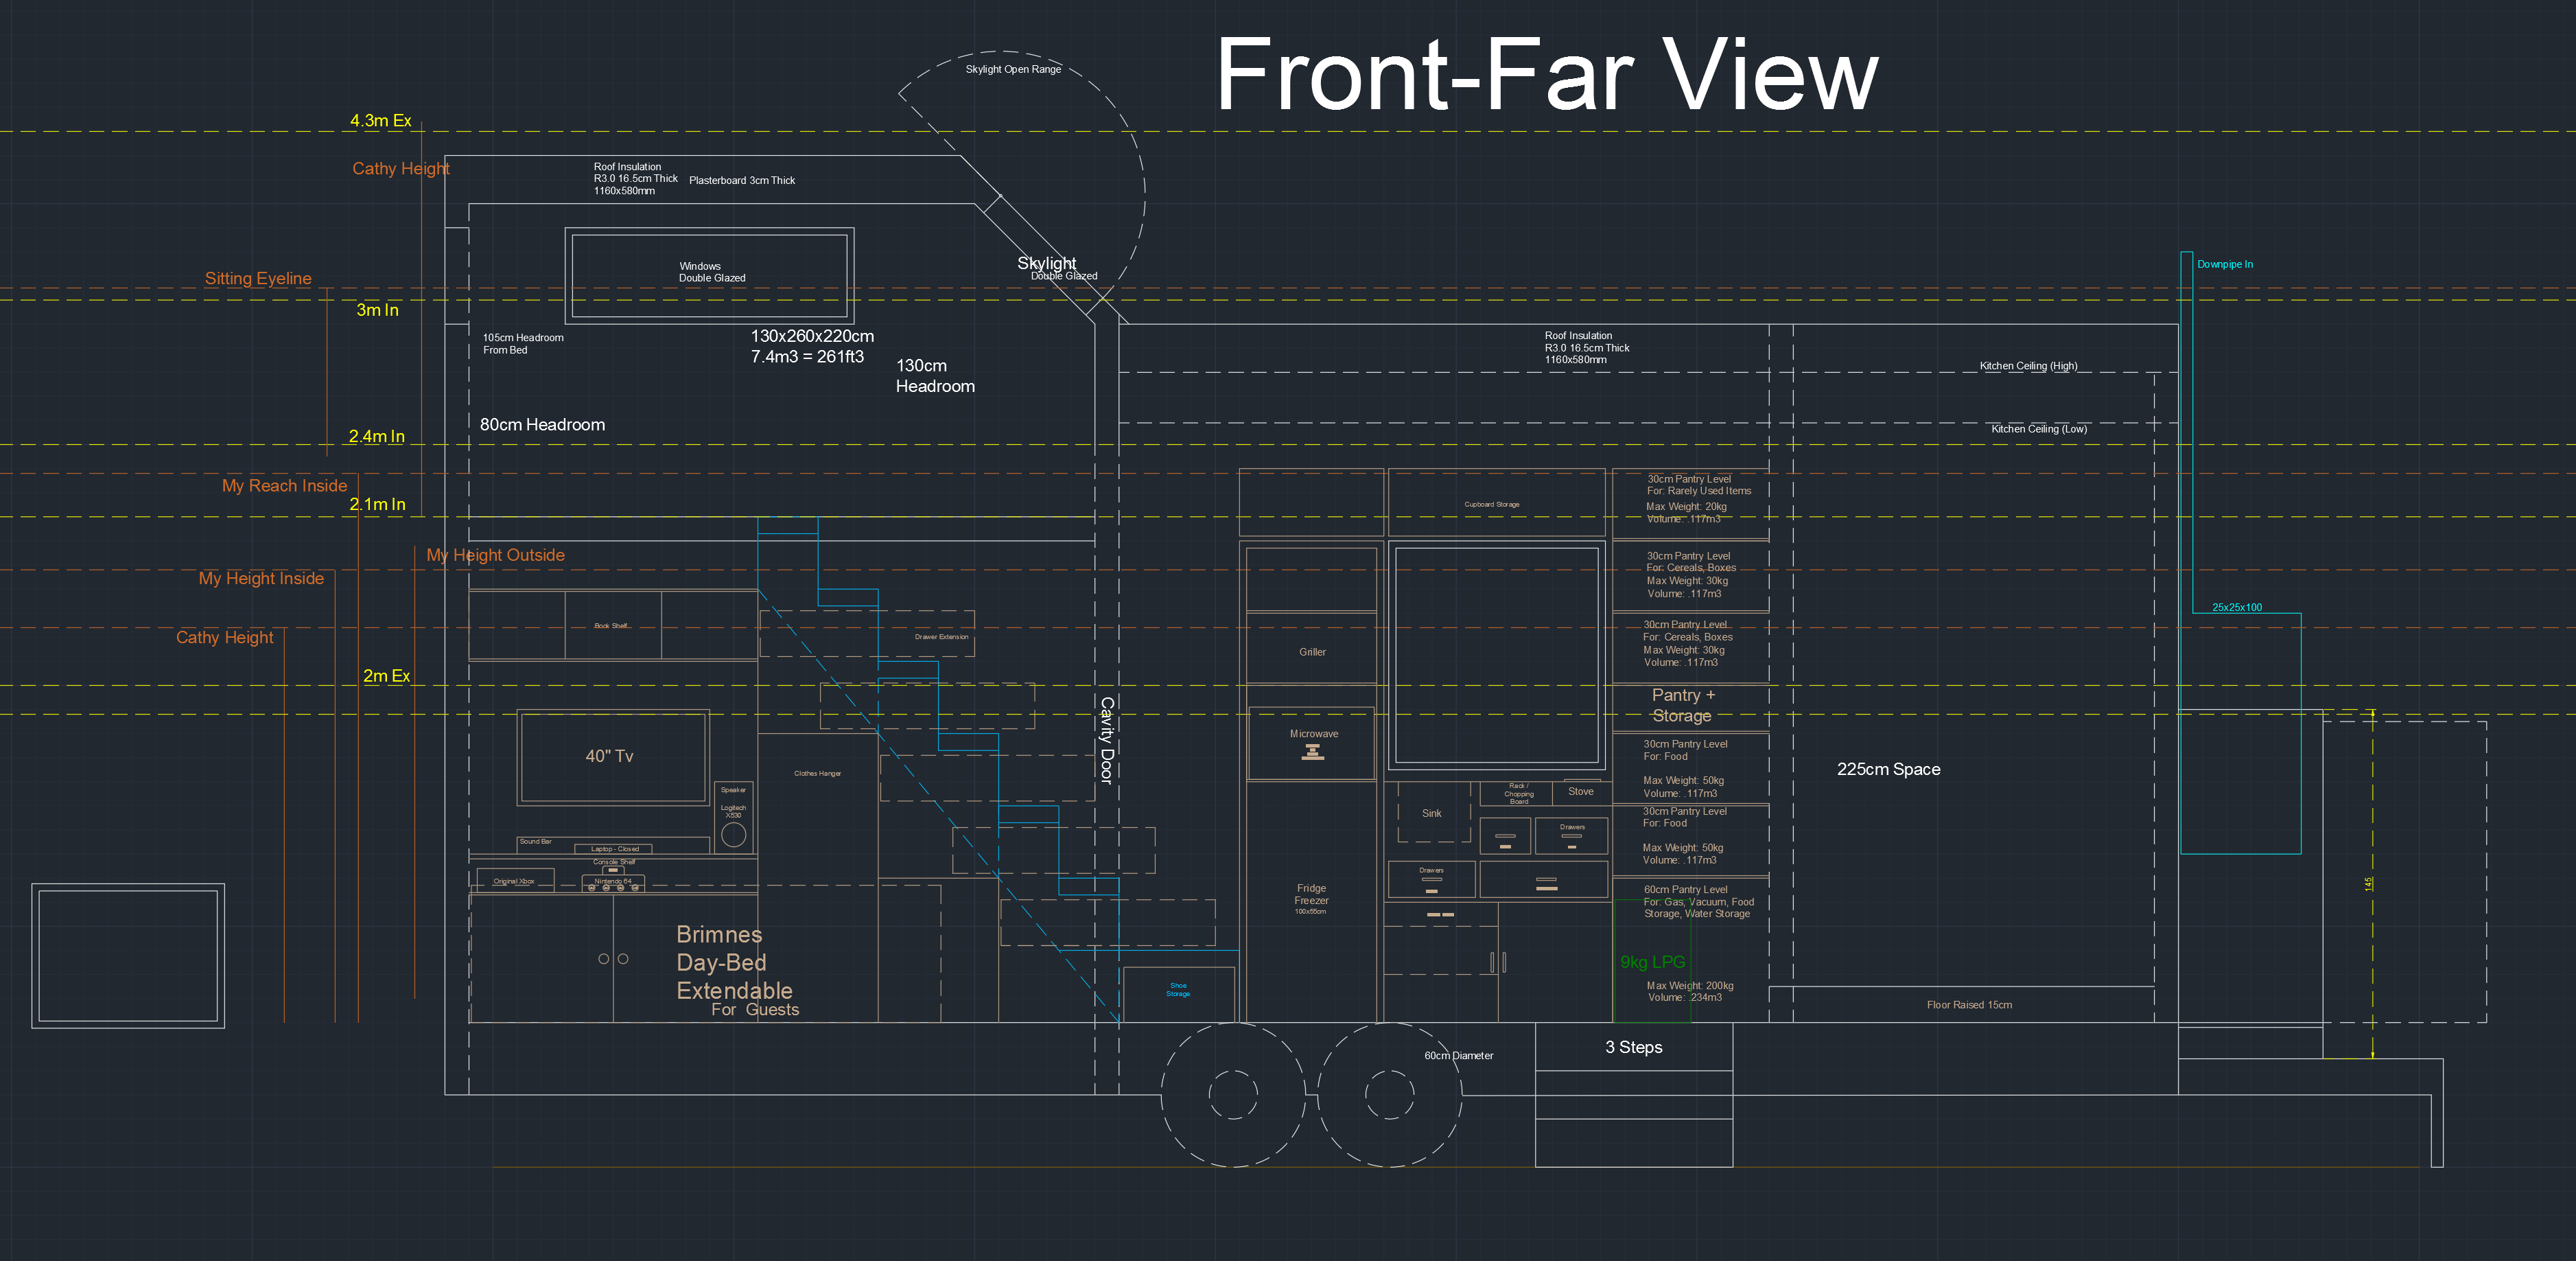
There was some trouble figuring out if I wanted a ladder or staircase to the loft and whether the loft should be entirely enclosed or just a higher platform above a room. The air conditioning will be confined to a space if there’s a ladder but I also didn’t want to have to climb a ladder if I was injured or sick every time I wanted to reach my bed. Finally I settled on a small staircase next to the kitchen which can also be used for storage as well as making it much easier to reach.
The size of the furniture was another point of angst as the IKEA furniture I had in mind had set dimensions and it’s difficult to fit in a tiny house unless that space is designed for it. This was the problem with my computer desk (IKEA – MALM) – as spacious as it is it would be difficult to maximise the corner space of the room, so I’m more leaning to a desk that can be flipped up or down and have fixed monitors to the wall.
Design
I wanted rooms which could be sealed off for multiple reasons: 1. To keep the cold/warm air within that room when using heating or cooling. 2. To use as a private space to get away from my significant other if the desire arises (or vice versa). 3. To keep noise somewhat minimised between rooms.
This came with a few downsides: 1. The space doesn’t feel as open as conventional tiny houses which have a kitchen in the same space as the bedroom and loft. 2. It takes additional space from the house (12cm). 3. It has additional costs.
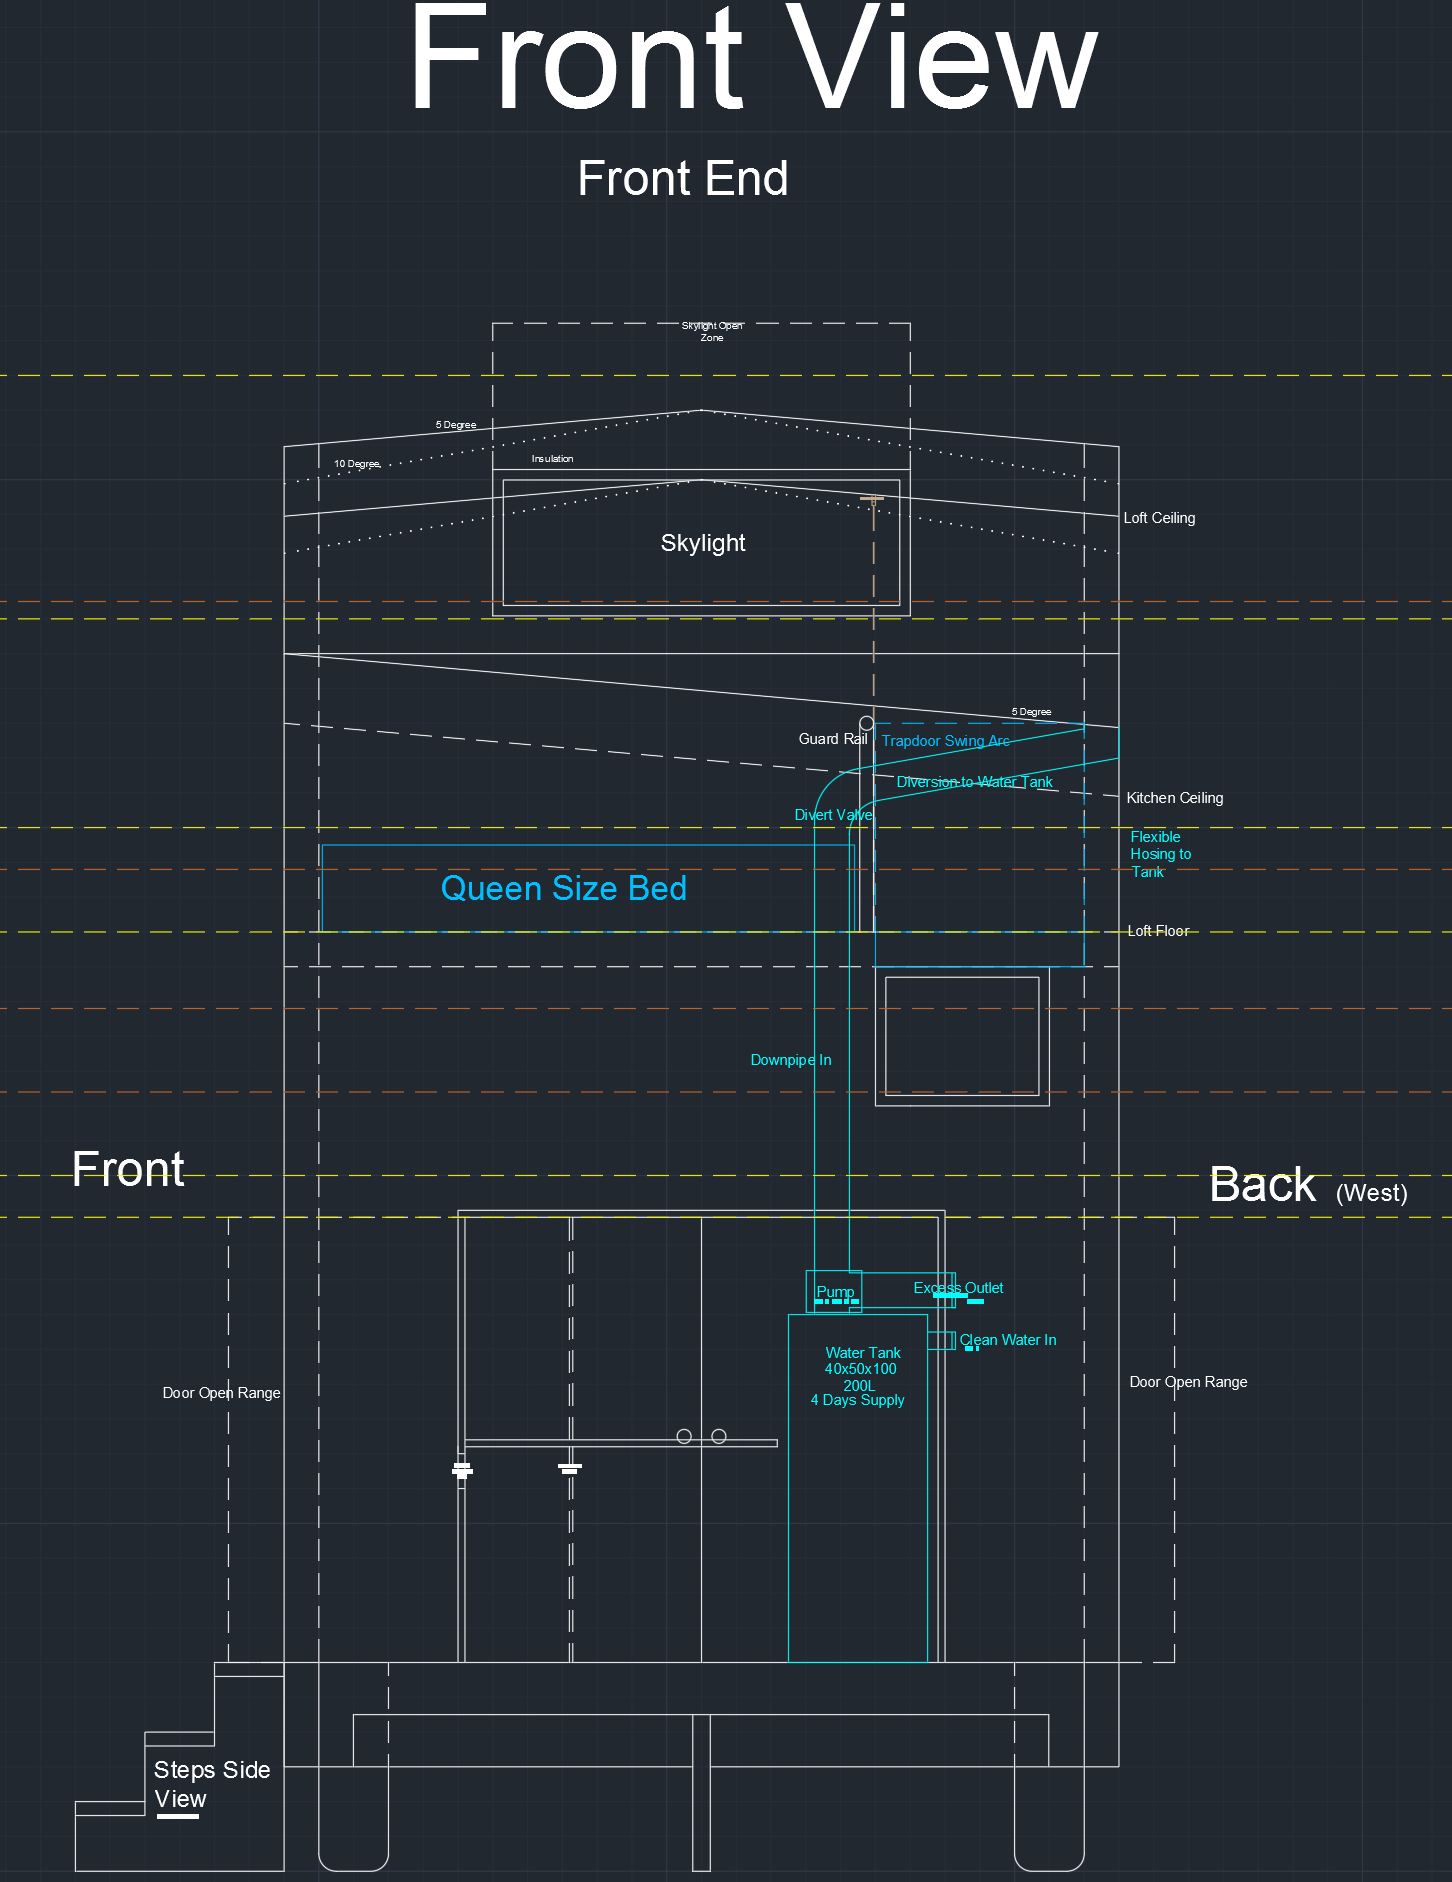
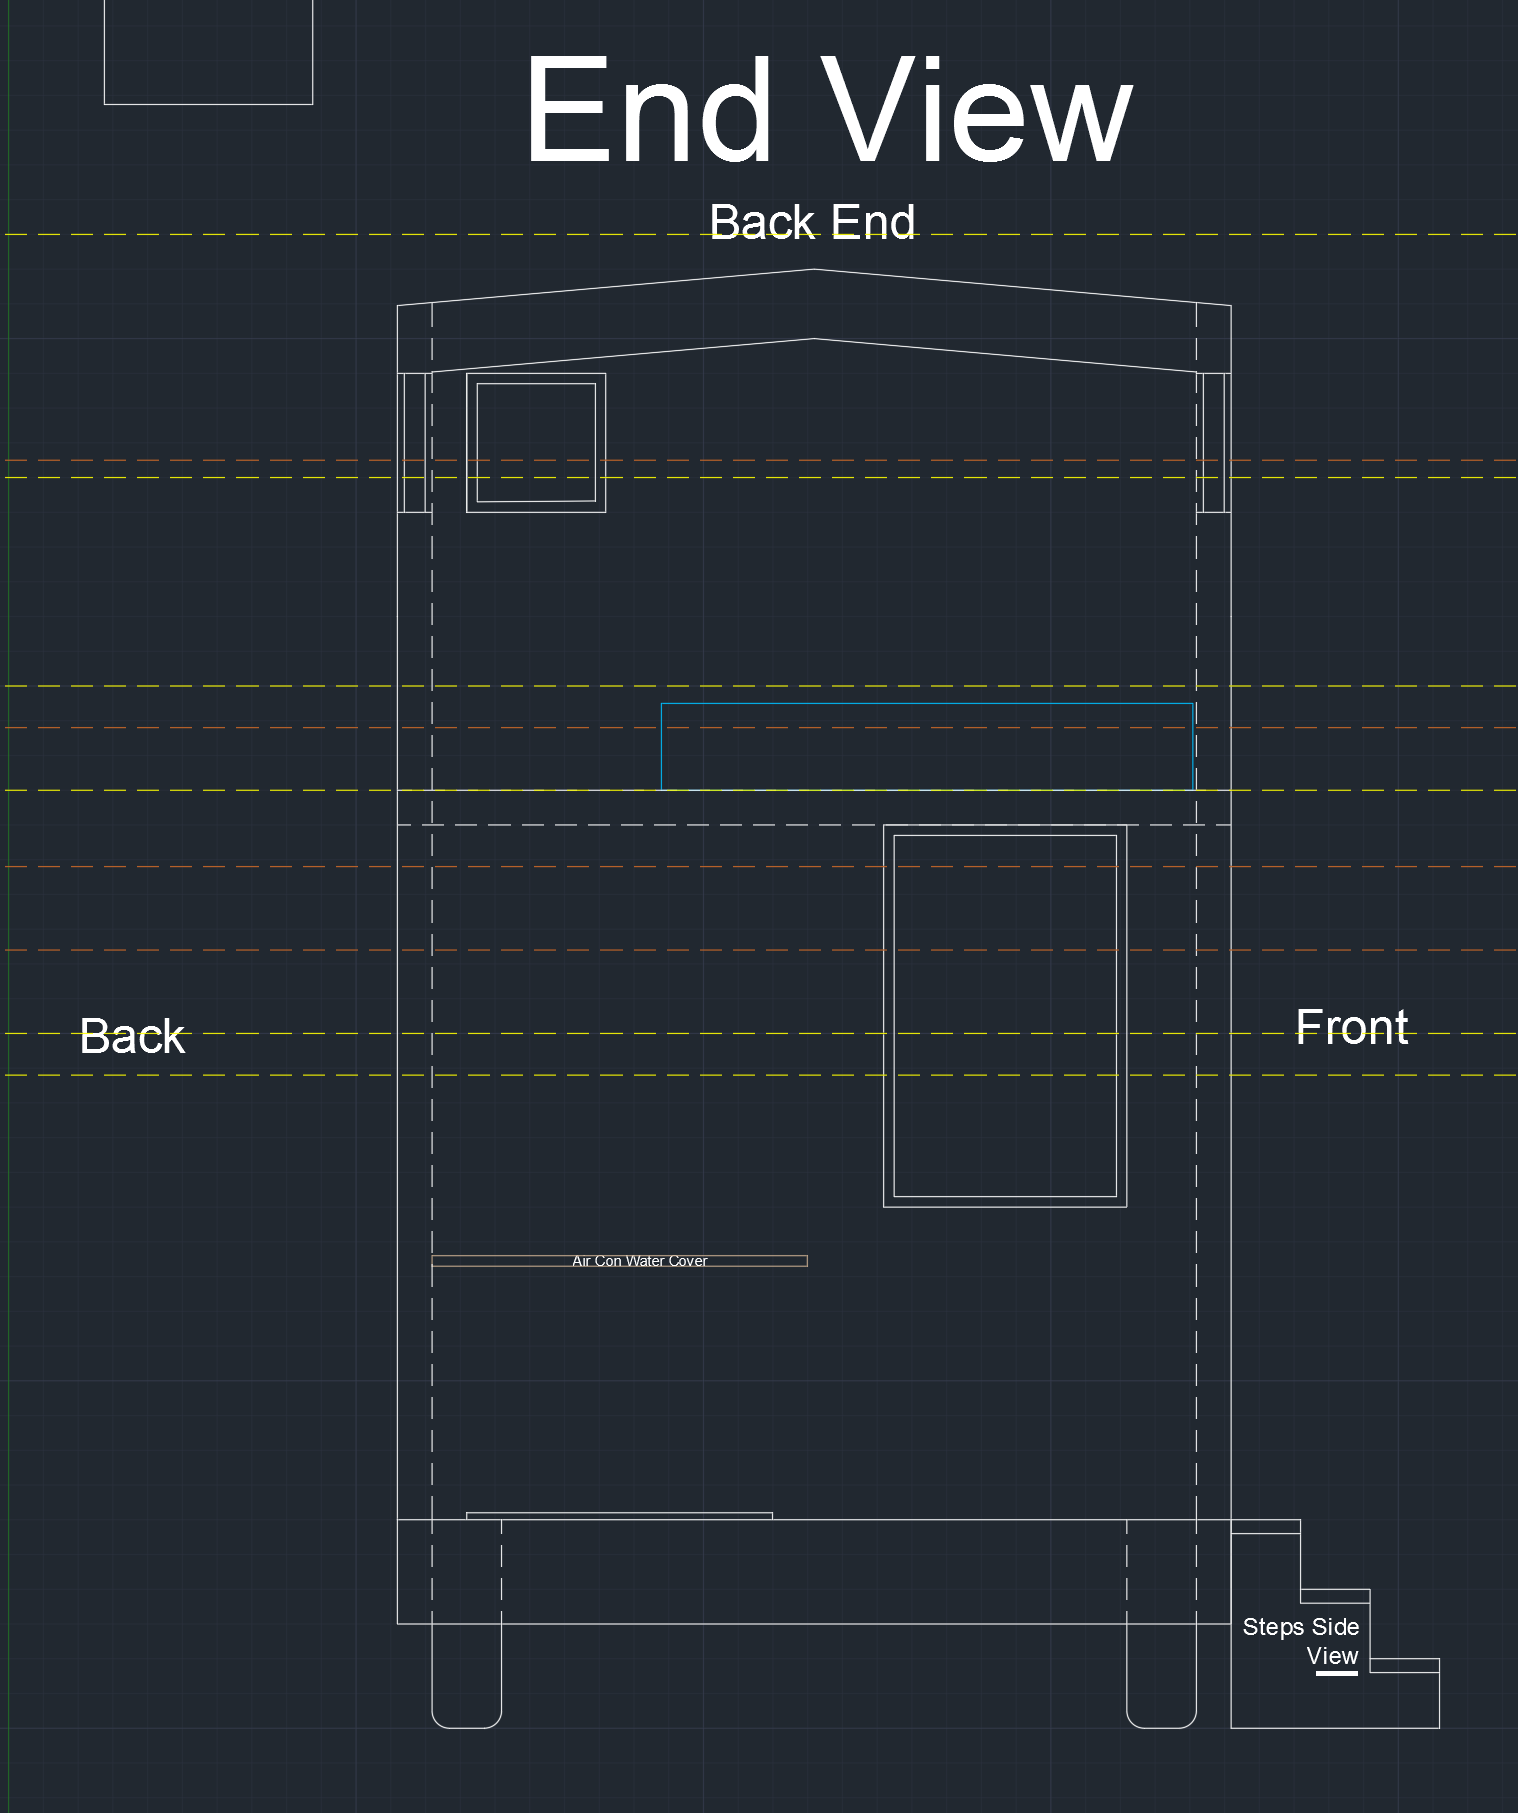
Because I added a staircase instead of a ladder to the loft there’s the problem of the loft not being sealed off. The loft has the main air conditioner mounted to the wall, it also will bear much of the heat from the sun through the roof in addition to being the highest point in the house where heat will accumulate. Therefore I’ve decided to add wooden flip-up flooring to the staircase to seal the room up at night which will slide out from the lofts floor framing just like a cavity door but horizontal.
The loft also has a double glazed skylight to watch the rain from and to give some extra lighting if you want to read a book up there. It will also give access to the roof to clean the solar panels and a point to stand up if desired. When I don’t want light coming in (at all) I thought of adding a scrolling blackout curtain which can be hooked and unhooked with ease to block 100% of the light.
Hobbies
It’s important to design your future home with your CURRENT hobbies in mind. It’s pointless to design a house saying you won’t need room for quilting because you’ll give it up when you build it. That’s just asking for trouble because at some point you will want a nice big floor space to be able to spread everything out on.
The hobbies I currently spend the most time on and which I will have in mind when building are:
1. Computing – Whether designing, music making, programming or gaming. Due to this I’m wanting to keep a similar setup to what I have now which consists of a small pc, 2 monitors a surround speaker setup and camera. This will mean I have a slightly larger and comfier pc space preferably with a view of outside from the screens and the option to close the curtains and remove glare in necessary. There’s also room for a wireless network to support using the internet from a laptop in the loft if desired.
2. Photography – Most of this is done outdoors in the serenity of nature which means it only requires the space for camera storage as I already have a designated location for editing photos at a computer. I could also use my laptop in the loft if my significant other has work to do on the desktop. Super macro photography is something I enjoy as well but which is generally done indoors under strong lights, so I may have to keep thinking about where I will do that.
3. Entertaining – This isn’t generally done in a tiny house due to the home being built for you to live in. But kudos to the guy who loved spa baths so much he built an outdoor one onto his tiny house’s back porch. You can add anything you want to a tiny house as long as you can make it fit. So I’ve added a room with surround sound, 40 inch tv and an additional fold out bed for use by guests if they want to stay the night. I want to be sure that it will get the use from it before adding it to the house however.
4. Poi Spinning – This requires a lot of space so outside is the obvious choice and no alterations need to be made in the house. It’s basically spinning LEDs or fire around your body in patterns.
Remember that even outdoor hobbies can affect the layout of the home. An example being surfing because you still need somewhere to store your board when not in use, unless you want it rained on.
Power
Due to all the electronics in the house and my desire to be off grid it’s essential to have enough to last me about 5 hours computing time (in addition to all other power requirements) each day. I went around and measured the power usage of all my commonly used appliances to see how much they drew and then calculated how much power I would need if I ran them for the typical time I used them during a day.
The results were rather surprising, a few items used MUCH more power than I thought they would such as my sandwich press coming in at about 1000w and some were far under what I expected such as my Nintendo 64 at 5w. Doing this helped me understand my power requirements day-to-day and what I will need to fill and surpass those requirements. Noting that the sun isn’t always out I had to calculate a fair excess of solar for what my needs would be for those overcast days. Luckily sun is ample here in Queensland also known as the Sunshine State.
I probably couldn’t get away with running my electronics as much as I wanted, so depending on how things go I may have to add another batch of solar panels on the ground somewhere. My aim is to use 12v DC where I can in the house particularly for lighting and fans and an inverter for 240v for everything else like the air conditioner. I had a look at solar powered air conditioners and am still deciding if they are right for my build.
That’s about all for this post, I’ll keep you updated when it’s progressed a fair amount.
